cookieChoices = {}
Image Map
Showing posts with label DIY. Show all posts

Friday, 20 December 2013

Christmas Gift Ideas: DIY Christmas Cards (Part 3)

Hello lovely people!

Welcome back to the last part of our Christmas DIY cards series! Today's card is SUPER EASY and fast to do. I'm going to show you my print out cards that I designed and created using the tools on Picmonkey and Microsoft Office. I'm usually more of a cut and glue person when it comes to cards, but one can't deny the convenience and ease of print out cards. Thus I'm going to share the print out cards files with you here. You can also customize how the cards look like even after they are printed out, such as adding a photo inside or adding on little decos. I'll show you how I did my cards and  customized them so they don't look run-off-the-mill.


The 3 card designs available: (from left to right) Card 1, Card 2(stripes card) and Card 3(words card).
  • First off, download the files.(Files are in PDF format)

First card:Click here
Second card:Click here
Third card:Click here
  • Print the card on a piece of white A4 size paper. For the third card, you can use other coloured paper as well since it is in black and white.
  • Cut away the excess paper marked out by the vertical line.

  • Use a creasing tool to mark out the lines that you have to fold. These lines are indicated by the dotted lines. 
  • Fold both the left and right side of the cards inwards to get something that looks like the card in the picture below  
  • Write a message inside the card or add a photo. Decorate the card as you wish, both outside and inside.
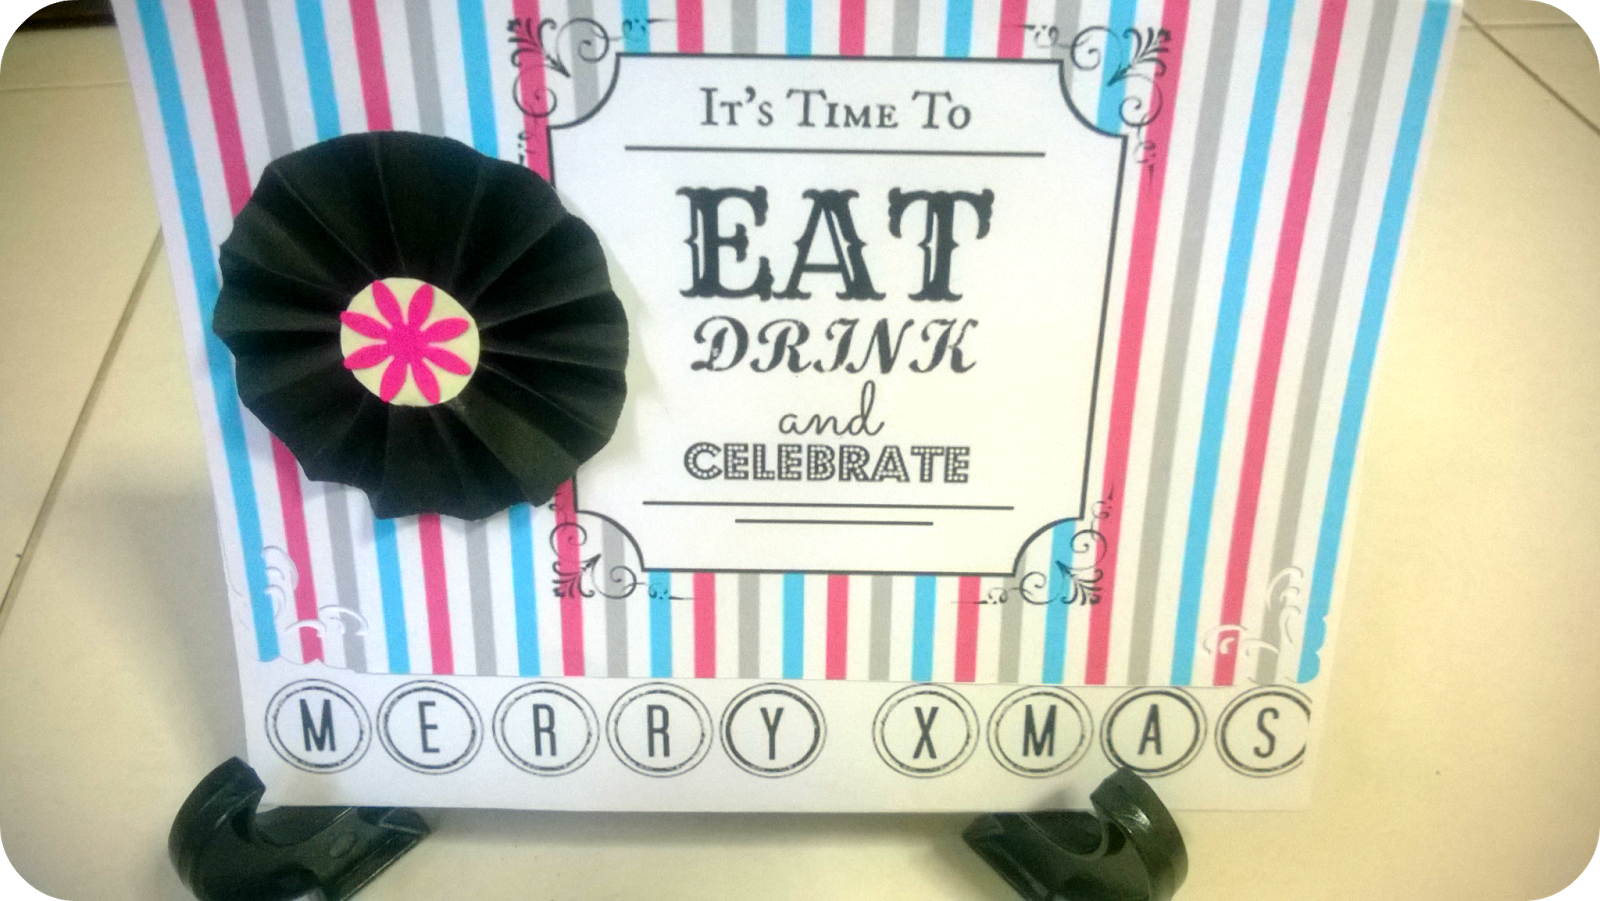
  • To decorate, you can tie a ribbon around the card as seen in Card 1 or make a flower like in Card 2.
How to make the paper flower:(refer to pictures for visual help)
1: Cut a strip of paper around 15 cm long. The width of the strip will be the radius of the flower.
2: Fold like how you would fold a fan. 
3:Make a circle with the strip and glue the ends together. Glue on a circle or flower shaped paper in the centre.

Here are pictures of the cards:

Card 1: A snowflakes card that looks really cute and cheerful with the scalloped edge. I added a pink ribbon to make it more girly.
Card 2:  A card that reminds me of a carnival due to the colourful striped background (it's the same as our blog's bg).
Card 3: A simple monochrome card that uses text for decoration. Suitable for both genders and gives off a mature but fun vibe.

Well I hope you do take a shot at making these cards this Christmas. It'll make a great gift by itself or as an add-on besides the Christmas gift you're giving! I hope enjoyed our DIY Christmas Cards series for this year. Here's to wishing you a good Christmas filled with fun and food. 

Here're the 3 cards again after I was done with all the decorations! Don't they look pretty?


Till next time.
Love,
El   xoxo


Wednesday, 18 December 2013

Christmas Gift Ideas: DIY Christmas Cards (Part 2)

Hello lovely people!

Welcome back to Part 2 of our Christmas DIY cards series. Today's card is for all those Whovians out there as we're making a TARDIS card! This will be a super awesome gift for those Dr Who fans anytime of the year. A TARDIS card will make a special gift since this year, since not only is this year the 50th year since the show has aired, but also because there's going to be a new Doctor this Christmas! Hands up if you're excited to catch this year's Christmas special.

I'm going to show you how to make a TARDIS card in 2 different ways. First one will be the easy card, which just involves printing, cutting and gluing everything together. The second one requires more effort, but it definitely is cooler. I actually made this card for my friend's birthday earlier this year and she loved it. Sorry that there's no final completed picture for this because Christine didn't help me take a photo of it after she finished gluing the parts together. Anyway, let's ditch the rambling and get started :)

TARDIS Card: The Easy One 
Materials:
  • A piece of blue paper (TARDIS blue)
  • TARDIS stencil (click on link below)
  • scissors
  • glue
  • ruler
  • writing materials
Steps

  1. Draw out your own TARDIS if you can. You can access my TARDIS picture with the measurements by clicking on this link.  Well, I did this part, so I've scanned the finished version and uploaded it. You can get it here. (NOTE: You have to use a paper that is not too thick or else your printer is unable to print it. I learnt this the hard way when my printer got jammed *cries*)
  2. Click on link and open file. Print it on blue paper and cut the outline. 
  3. Open the file for the TARDIS add ons (like the windows etc) and print them. The add ons like the windows and 'Pull to Open' poster have been sized to the scanned drawing, so if you printed the TARDIS drawing in original size, everything should fit nicely. Cut them and print them. Don't worry if you screw up the cutting since I made extras for such purpose. 
  4. For the window panes, I made small white rectangles because I used them as stencils to draw on black paper and cut them out. If you're lazy, just make the rectangles black, print and cut them out. 
  5. Glue the add ons to the TARDIS as shown in the picture. Download the TARDIS add on document here. The respective places have been marked out so you just paste accordingly. You can choose to write a X'mas message behind or add on anything else to make the card look more festive :)
  6. And now you've got your very own TARDIS card!

Tadah! A simple TARDIS card is formed!

TARDIS Card: The Difficult One


This is how it should look like in the end. Notice that you get to open the doors! 

Materials:
  • 2 pieces of the same blue paper and other coloured paper
  • glue
  • scissors
  • clips or stapler
  • ruler
  • writing materials
Steps
  1.  Same as the easy version. Print the drawing outline by clicking on the link here. Use your blue paper or rough paper if you're going to be doing step 2. If you can print it on your paper, then skip to step 4. I advise you to make 2 copies of the TARDIS if you're printing. You'll need one copy to be the base TARDIS and the other for the doors.
  2. Now this is the important part if you're using a thick paper that your printer rejects(aka it's too thick to print). You take the printed paper and attach it to your desired TARDIS paper using stapler/glue/clips. The printed TARDIS picture will act as the outline for you to cut along. Cut carefully!
    You should get something like this. Notice there aren't any lines on it.
  3. Now, take a pencil and ruler and draw back the lines on the TARDIS based on what you see on the printed version. Don't need to draw the doors part because we'll be making the doors. Take a black ink pen/marker and draw over the pencil lines. This will be your base TARDIS.
  4. Alright now for the doors part. For those who did the printing method for the TARDIS, this is where you continue reading. You should have 2 TARDIS printed out. Take one of it and cut away the parts that are not the doors as shown by the black dotted lines in the picture. Cut the doors in half to separate them. You should end up with a door for each side of the TARDIS.  Fold along the white dotted lines as marked in the picture to make the tabs. 
  5. For those who did the cut and draw in the lines method, measure the TARDIS doors and draw them on another piece of TARDIS blue paper. If you're lazy, take the TARDIS that you printed to act as a stencil and cut out the doors portion. Use that as a stencil to draw the doors. Add a 1cm tab along the sides of both doors so you can fold and glue to the base TARDIS.  For this step, you still have to draw in details on the doors.
  6. Print the TARDIS add ons and cut them out. Download the add ons from this link. Glue them to the respective places.
  7. Glue the tab part of the doors to the base TARDIS. Now you have a TARDIS card with doors that can be opened and closed! For the inside of the TARDIS, you have to cover the lines with a picture or a paper. You can print a picture of the inside of the TARDIS and scale it to the right measurements and then paste it. Or you can take a nice piece of paper and cut it down to size and paste it there to cover the lines. Then take a pen and write a lovely, heartfelt message on it. 
This should be more or less how your final TARDIS should look like. I've not glued in the window panes for this.
Final notes:
In case you've missed out on the available resources, here's the round up.
Picture of TARDIS for printing:here
TARDIS add ons:here
Picture of TARDIS with measurements:here

That's all the steps needed to make a TARDIS card. Now make one and surprise a Dr Who fan. If you're unfamiliar with how the TARDIS looks like, Google images and note down the details. I hope you enjoy making this card! Check back again tomorrow for the final segment of our DIY Christmas Cards series!

Till next time
Love,
El   xoxo


Tuesday, 17 December 2013

Christmas Gift Ideas: DIY Christmas Cards (Part 1)

Hey lovely people!

Christmas is coming and your wallet's almost empty. What presents can you get for your loved ones, you wonder. How about making Christmas cards? It's always the thought that counts, and I find that handmade cards with heartfelt wishes make sweet gifts. I think it's wonderful that someone would put all their efforts into making and writing a card. The thoughts put into making a card can be worth just as much as a store-bought gift or more...like a pencil case. For this Christmas, we're going to show you 3 different kinds of card designs that you can easily make yourself! We'll be posting a card DIY tutorial here for each day. If you're excited about cards, skip this long introduction and look at the instructions. Still unconvinced about making cards? Then keep on reading!

So you might be thinking, "A card is just paper. It's rather...cheap." There are tons of reference materials out there that you can draw inspiration from to make your card look cool.  However, one problem I find with those beautiful cards I see online and in scrapbook magazines is that they use such EXPENSIVE paper and tools. This is a problem if you're not a frequent crafter. Honestly, a piece of scrapbooking paper costs $1++ each in Singapore. Stickers and stamps cost even more. A tip to get pretty paper is to PRINT them. There are awesome sites and images out there that you can use as paper background. You can even make your own by designing them using Paint or Powerpoint. If you've got Photoshop, go ahead and use it. Anyway, choose a couple of designs and print them using laser printer. If you're seriously broke, use wrapping paper or normal coloured paper. Or just grab a marker/colour pencil/pen and draw. A little thinking can do wonders. A useful place for printable deco paper is Craftingeek's site, where you can find beautiful papers available for downloads and print. 

For tools, you can make use of things around your house or just buy them. I don't buy many tools, because they're usually so expensive. But if I want any tools, I'd go Daiso. It sells a smorgasbord of things for $2 each. It sells craft punches for $2, which is at least $3 cheaper than the prices in specialty craft shops. It has embossing tools also, but I've yet to try them. Craft punches can save you a ton of effort on cutting out deco pieces. Like stars for example. Drawing and cutting out stars by hand can be pretty frustrating (something that I've learnt while making Christine's gift a while back). A star-shaped craft punch can reduce the hassle. I'm pretty sure most people would have the usual scissors and glue, if you don't, go borrow some. If you need a creasing tool, just use the point of your scissors or a bobby pin.

For today’s post, we’re doing a pop-up 3D card!


I saw something like this selling online and I thought that it is an easy card to make. This card took me around 3 hours to make from scratch; including time spent figuring out the measurements and such. Christine and I have made cards of 3 different sizes using the same method.

Materials:
-       Scissors/ Penknife
-       decoration papers
-       glue
-       colour markers/pens
-       paper punchers (optional)
-       printouts (optional)
-       pencil

Steps

1.    Use a piece of firm paper like card stock paper. Decide on the size and shape of your card. Do you want the background to be square or rectangular? For my card, I decide to make it a square that measures 12x12 cm.

The 12x12 cm part will be the background. The 4cm part is the stage. The 1.5cm parts are the 'legs'.


2.    Next is deciding on the depth of the ‘stage’. The ‘stage’ is the part where you stick the pop-up figures on. The longer the stage, the more space you have to create the depth for your card. For the ‘stage’, I made mine to be 4 cm long. However, my advice is that you make the stage around half as long as the background to give your card the support it needs to stand.

3.    Make ‘legs’ that measure 1.5cm to 2 cm, depending on size of the card. For this card, I used 1.5cm.

4.    Now, take a creasing tool (use the edge of a scissors or back of a needle etc) to crease the lines. This will help you fold nice edges without excess paper wrinkles as you’re using thick paper. Crease along the lines as shown by the dotted lines in the picture.
Take a ruler and run your creasing tool along it. I'm using my comedone remover because it's the best creasing tool I've got(I've washed it really clean >.<).

5.    Decorating time! This is the fun (but tiring) part. You can paste deco paper on the card’s background to make a pretty backdrop. Decide on the items you want to put in the card such as Christmas tree, presents, tv, fireplace, words etc. You can draw out the decorations or print out pictures and add tabs at the bottom. Fold the tabs and glue it to the ‘stage’ part of the card. I’d advice that the tabs be at least 0.5 cm wide. 
Things to note: don’t decorate the background of the card using heavy papers. If you do, the card may not be able to stand as the legs will not be able to support the weight.

I used my flower craft punch from Daiso to punch out pretty blue flowers that can look like snowflakes.


Christmas tree drawing for dummies: Draw triangles and stack them as shown above. Remember to leave a tab of around 0.5cm at the bottom!


6.    You can write a message on the back of the card. Just apply glue to the 1.5 cm section between the background and the stage to join them together. Now you're done!
Tadah! I decorated my tree using a black marker and drew fairy lights on it. Simple and easy for those who can't draw or are short on time. 

You can make bigger sized cards like what Christine did:
She did a 15x15 cm sized background. Notice the 'stage' part of the paper is also bigger.

And this is her finished product! She's gotten creative with making pop-up words and a cozy fireplace. You can print out words and add tabs at the bottom to save the trouble of drawing and cutting.

You can also make small cards like so:
A cute mini version! I used leftover pieces of paper to make this.

A look at the finished cards! Don't they look pretty?

Well I hope you've enjoyed this card tutorial. I do hope you try this out if you're looking for card ideas :) Check back again soon for the next installment of the DIY Christmas cards series. 

Till next time
Love, 
El   xoxo

Another New Look for Christmas!

Hey lovely people!

What do you think of the blog's new look? I finally got some time on hand to revamp the blog, as well as attempt to make the blog look better. Since Christmas is coming very soon, I thought I might as well use the traditional Christmas colours of red and green for the blog. Instead of using bright red+green colours, I used the milky/pastel versions of red+green to tone the colours down. I like it this way since the colours will look more "girly" and less in your face. I've been reading up more on HTML and other tips to customise the blog, so expect more changes to the blog's look in the future! Hopefully I get better and more resourceful at doing this kind of things with time, because all the coding is like rocket science to me. Don't be surprised if the blog's appearance keeps changing in the meantime whilst I fiddle with a couple of details.

Since we're on the topic of Christmas, how're your preparations for Christmas? I've been doing Christmas shopping for myself and for others. There are just simply so many sales going on! I've been to The Body Shop lots for skincare stuff and also Metro and Watsons to check out the makeup. If you're still stumped over what to get for Christmas, check out our recent Christmas shopping guides! They just might help you get started thinking on ideal gifts for your loved ones. For those who are broke, check back here tomorrow for our DIY Christmas cards! They're pretty+easy+cheap to make, and handmade cards are always wonderful gifts.

Well I hope this December has been great for you so far, and will continue to be even better. Have a goodnight and check back here tomorrow!

Till next time.
Love,
El   xoxo
Related Posts Plugin for WordPress, Blogger...